|
How To Make Cat's Ears
|
| 1-Tools |
|
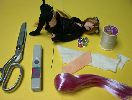
What will you need to do cat ears.
1-scissor (a good one)
2-CA glue (cyanoacrylate), I use Tamiya this time, it goes well.
3-neddle
4-felt, use a good quality
5-doll head
6-thread (color matching to the felt) and use the one for button, the sturdy one
7-some attach for the hair (you need 4 of them)
|
|
|
| 2-Prepare the ears |

|
Now cut the felt the size you desire. I really suggest that you don't do it too big, it won't look good.
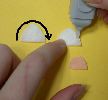
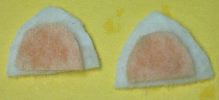
For the cutting pink part, here is what I do. I cut it the same size as at the main color and the cut it smaller until I'm satify.
Now, you need to put some glue to make it more sturdy. Put glue around the main color and then put some glue on the pink and put it on the main color.
Let dry for a night and then you will be ready to sew.
|
|
|
|
|
| 3-Prepare the head |

|
Now that your ears are ready, you need to prepare the head.
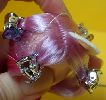
Separate the hair to make a line where you will sew the ears.
I use some attach to keep the space and I won't have the hair in my way.
|

|
|
|
| 4-Start sewing the ears |

|
Take some thread and make a knot at the end.
Start at the beggining of the side of the ear.
Sew by passing by the neck knob and pass through the ears and return through the neck knob.
|

|

|
|
|
| 5-Sewing the first ears |

|
So use the same method (through the neck knob-the ears-the neck knob). I usually pass four time on the ears, try to make regular space between each time you pass through the ears. |

|

|

|
|
|
| 6-Sewing the second ears |
|
For the second ears, just do the same use the same method as on the first one.
I just use the same thread that I go on the other side.
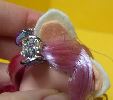
When you have finish, make a ending point (just pass 2 times at the same place). Take a look at the third pictures.
Just cut the thread on the neck knob.
|
|

|

|
|
|
| 7-Finish!! |
|
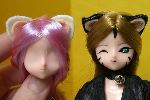
The ears are finish!!
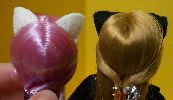
Sometimes, you may need to recut the ears, to make them less large, but that is really depending of you.
Do enjoy them!!
|
 |