|
How to root my way (with volks hair)
|
|
|
|
|
|
|
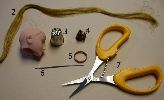 |
| First of all! You need to get all the tools you will need to root.
1. Skin head
2. hair
3. thimble (extra)
4. attach for hair
5. elastic
6. needle
7.scissor
Also please not that I use the root (from outside) and knot methode.
|
|
|
 #1 #1 |
 #2 #2 |
 #3 #3 |
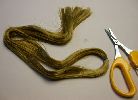
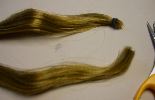
| 1. I'm going to root Tatsumi from Yami no Matsuei. Since he has a short cut, he doen't need to have really long hair, I cut the volks hair in 2. (pict#1-2)
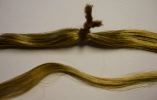
And then, I put aside one the half of the hair. And I use only a part of the half, this way it won't get all messy. (pict#3)
When it's finish, take some more of the half of the hair until you finish to root it.
|
|
|

Front
|
Side
|
Back
|
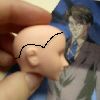
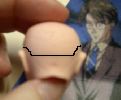
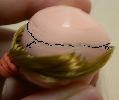
| 2. Do your guide line on your head. Since I use a neo head there is not really a line that you should follow. So I mark with a pencil the guide line I will use for the contour line. And don't forget to mark your middle line.
In this case the middle line is on the right side. but you could place it anywhere you want, there is no problem.
For a ponytail, you don't need to mark a middle line.
Please note : on picture I re-draw the line on photoshop since we don't see it much on picture.
|
|
|
 |
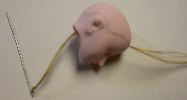
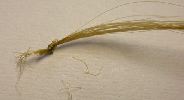
| 3. Now prepare your hair plug. I use about 20 hair part. But you will really found how much you need with time and experience.
Don't make it too big, it won't look well. If it's too big, you will have some difficulty to pull it out of the head. Too small will not cover the head right.
I put the hair in eye of needle and put the end together.
My needles measure is 2.25 inches.
|
|
|
 |
 |
 |
| 4. Now it's time to root!
You start from the outside, plug on the head then go outside from the hole. You may use the thimble when it's hard.
Knot and cut (between the knot and the needle). Now pull the hair plug.
|
| 5. Now you do the same thing all around the head. But you need to decide the space between each hair plug. On this example I go for a space of about 2-3 milimeter. (pict#1)
If you want to do a doll that will have a ponytail or will have the hair up, you should do your contour line all hair plug mostly touch. It will look better.
When you done some plug, I tie them and then use the attach them (pict#2). you won't have them in your way when you do a new plug.
When you have finish one circle leave a space of about 4 mm (for the middle line at the end. (pict.#3)
|

#1
|

#2
|

#3
|
| 5. Now you do the same thing all around the head. But you need to decide the space between each hair plug. On this example I go for a space of about 2-3 milimeter. (pict#1)
If you want to do a doll that will have a ponytail or will have the hair up, you should do your contour line all hair plug mostly touch. It will look better.
When you done some plug, I tie them and then use the attach them (pict#2). you won't have them in your way when you do a new plug.
When you have finish one circle leave a space of about 4 mm (for the middle line at the end. (pict.#3)
|
|
|
 |
 |
|
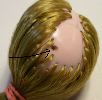
| 6. Now here is the next circles and the folowing one will be exactly the same. Again, I draw with a pencil a guide for the second line. I usually do the guide line more near the first one on the front (about 2 mm) and on the back I leave more space (about 5mm). Look on picture.
As always, keep the space for the middle part.
|
|
|
#1
|
#2
|
|
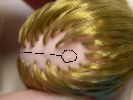
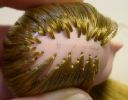
| 7. you will see on the top of the head, an hole. Just leave it and go after it. (pict.#1).
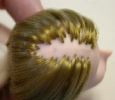
Depend of how long you want to do your middle part, you will not get a complete circle. The way I do there is alway one circle the will be complete (pict.#2).
On small head (neo, N and some SH) I do about 7 cirlces or less. On bigger head (A and other SH), I do 8 circles.
|
|
|
#1
|
#2
|
#3
|
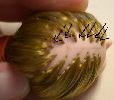
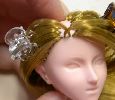
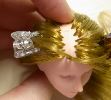
| 8. This is an optional step. I do it because it's do a better finish. So I root only one plug on the top between each row I first done. (pict.#1)
Pict.#2 : one side is done
Pict.#3 : 2 sides are done.
|
|
 |
 |
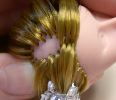 |
| 9. Now it's time to do the middle part. You plug on one side and put it on the other side. Look at pictures. |
|
 |
 |
|
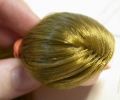
| 10. When you have finish to root the middle part, the rooting is finish. You need now to boil the hair, so they will go straigh down. |
| Boil the hair with Volks hair |
|
|
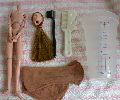 |
| First of all check if you have all the tool you need.
I use the doll body, the head I just finish to root, 2 brush (one small and one more big), a nylon stocking (that have been cut) and a glasses (mine is in plastic). you will also need some boil water.
|
|
|
 |
|
|
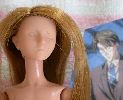
| 1. Now put the head on the body you have choose.
And place the hair. since Tatsumi has the hair a little bit on his face and the rest go beside, I place the hair this way.
|
|
|
 |
 |
 |
| 2. Then you oput the nylon stocking on his head and give some tension. Be careful to change the hair place (you could make some hole this way).
Put the hot water in the glasses. Put the head on it for 10 secondes (it's enough). Then remove the head and wash it on cold water.
|
|
|
 |
 |
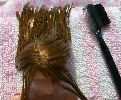 |
| 3. Remove the nylon stocking. It will look like a bad hair day.
Brush the hair let them dry.
When the hair are dry you are ready to do your haircut and paint the face.
|